Amateur gardeners often grow fresh herbs not only in summer but also in late autumn, using mini-greenhouses for this. With their help, you can also grow seedlings in early spring to get a crop of fresh early vegetables. Today, there are many types of such structures - they can even be placed in the house and used to grow any plants and crops. In this article, we will consider the main types of mini-greenhouses, their purpose, and get acquainted with the manufacture of mini-greenhouses from bottles, wooden battens and glass, as well as PVC pipes and films.
Differences between greenhouse and greenhouse
In everyday life, the words "greenhouse" and "greenhouse" are often used as synonyms, but this is not exactly the same thing. The difference between the two buildings is what microclimate is created in each of them. A greenhouse is a small-sized structure that is heated intensively by the sun, resulting in a semblance of a greenhouse effect inside. The greenhouse usually has larger volumes and warms up not so intensively, therefore the microclimate inside it is closer to the natural one, but there is no greenhouse effect.
Did you know? Greenhouses were invented in ancient Rome. Then they were carts with plants, which were exposed outside during the day and put into the room at night.
In the manufacture of structures for home growing seedlings, the terms “greenhouse” and “mini-greenhouse” can really be considered equivalent, since in both cases we are talking about small-sized structures that are well warmed by the sun.

Types of mini-greenhouses for seedlings
There are several types of mini-greenhouses for seedlings.
Depending on where this construction is located and for what purpose it was built, all mini-greenhouses can be divided into 3 large groups:
- Outdoor - Suitable for summer cottages, are stationary directly in the garden or adjacent to one of the walls of the house.
- Indoor - are placed indoors. They can be used not only for growing seedlings, but also for caring for moody indoor plants.
- Portable - represent mobile designs. In winter, they can be kept indoors, and in summer put on a balcony, porch or garden.
In addition, mini-greenhouses can be classified according to the type of their design and the type of material used to make greenhouses.
Frame and portable
All mini-greenhouses can be divided into frame and portable. The first option involves the presence of a frame.
It can be made of the following materials:
- aluminum parts that fasten with bolts and nuts;
- steel pipes welded to each other using a welding machine;
- wooden slats connected with screws or sealant;
- Hot-pressed PVC pipes (using a soldering iron).

The portable mini-greenhouse in appearance resembles a small cabinet with several shelves. This option takes a minimum of space in the house, and it can be freely moved from one room to another.
The design of a portable greenhouse usually consists of the following elements:Important! If necessary, in mini-greenhouses, you can install additional lighting, heating or ventilation.
- a rack with legs or wheels made of metal, wood or plastic;
- shelves for placement of seedlings made of metal mesh or wooden battens;
- a cover that covers the structure on all sides and has an opening front.

Polycarbonate Mini Greenhouses
The mini-greenhouse with transparent glass walls has the highest light transmission, however, the walls of this design are quite fragile and the frame is heavy, so it is not always convenient for transportation. Mini-greenhouses using a plastic film are more convenient and cheaper, but this material has a small thickness and is easily torn.
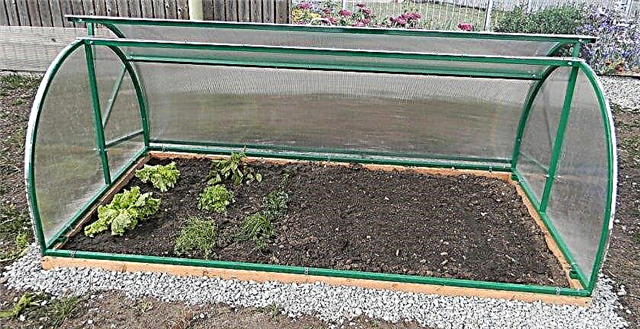
One of the most common materials for making small greenhouses is polycarbonate.
It is a plastic sheet with a thickness of 2-8 mm and has several advantages:
- it transmits sunlight well;
- little prone to accidental mechanical damage;
- bends well and stretches over any frame;
- allows you to create light and mobile mini-greenhouses for seedlings;
- well preserves the internal microclimate of the structure due to its density.
Purpose of the polycarbonate mini-greenhouse
The main task of a small polycarbonate greenhouse is to provide ideal conditions for the rapid growth of seedlings. Transparent walls of the structure allow sunlight to pass through well, and also protect cultures from the action of possible adverse external factors (drafts, temperature differences, etc.).
- The main functions and advantages of a mini-greenhouse made of polycarbonate are:
- creating within the structure a suitable temperature and humidity level for active plant growth;
- the possibility of gradual hardening of seedlings;
- protection against drafts and cold;
- ease of seedling care;
- availability of materials for manufacturing;
- relative ease of assembly of the structure;
- compact dimensions and the ability to move the structure to any place.
How to make a mini-greenhouse with your own hands
The process of making a small greenhouse for seedlings with your own hands requires some experience and skill, but it is not very difficult. Before proceeding with the manufacture of the structure, you need to decide what material it will be made of, as well as calculate its dimensions and draw a sketch.
Did you know? In the sixteenth century in Europe, greenhouses were used to grow exotic plants and were called "houses of oranges."
Next, we consider the main types of materials for a mini-greenhouse and the most common methods for its manufacture.
List of materials for the manufacture of mini-greenhouses
Home-made mini-greenhouses can have a different design, depending on how many plants or seedlings they are intended for.
At home, small greenhouses can be made using the following materials:
- plastic bottles:
- wooden slats;
- glass;
- PVC pipes and special adapters for their connection;
- polyethylene film;
- hot glue;
- sealant;
- Scotch;
- sandpaper.
Depending on the type of design, for the manufacture of such tools may also be needed:
- electric drill with a mill;
- soldering iron;
- building hair dryer;
- glue gun;
- construction scissors;
- saw;
- glass cutting knife.
Step-by-step instructions for making a mini-greenhouse
Depending on the availability of certain materials and skills, it is possible to produce various types of greenhouses for seedlings.
The most common are:
- home-made mini-greenhouse from a plastic bottle;
- glass greenhouses with a frame of wooden battens;
- indoor greenhouses made of PVC pipes.
Mini greenhouse from a plastic bottle
The simplest and most economical version of the mini-greenhouse involves the use of two plastic bottles of different sizes. At the same time, the diameters of the bottles should only slightly differ from each other. It is possible to make such a miniature greenhouse, even without special knowledge, since all the details of the structure need only be cut with a sharp knife and joined with hot glue.
Step-by-step instructions for making a mini-greenhouse from plastic bottles:Important! If there are a lot of seeds, it is worth constructing for their sowing similar mini-greenhouses from 5-liter plastic bottles. In such a greenhouse 2-3 small plants will fit.
- Cut the upper part of the smaller bottle with a knife at the bend so that a funnel-shaped part is obtained.
- In the same way, cut off the top of a larger bottle.
- To make the basis of the greenhouse, you need to use the glue gun to attach the cut off top of the smaller bottle, after turning it over to the bottom of the larger bottle.
- As the roof of the greenhouse, the cut off top of a larger bottle is used. She needs to cover the base of the greenhouse, into which soil must be poured and seeds planted.
Video: greenhouse from a plastic bottle
Mini greenhouse made of wood and glass
In this greenhouse it is convenient to germinate seeds and grow low seedlings. And if there are compact and heat-loving indoor plants in the house that require a special microclimate, you can also place them in such a structure. Transparent glass walls and a roof design allow you to admire the contents of the mini-greenhouse, so it should be installed in the apartment with a decorative purpose.
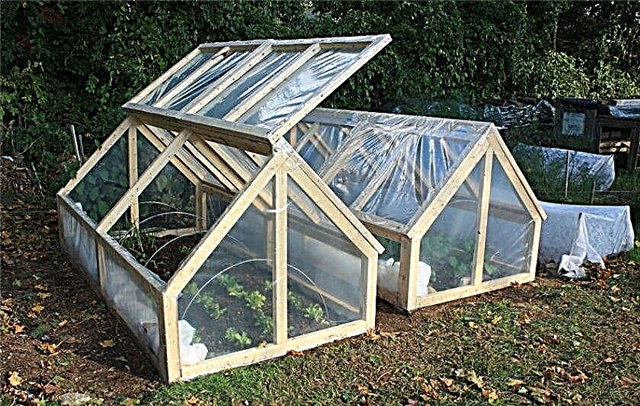
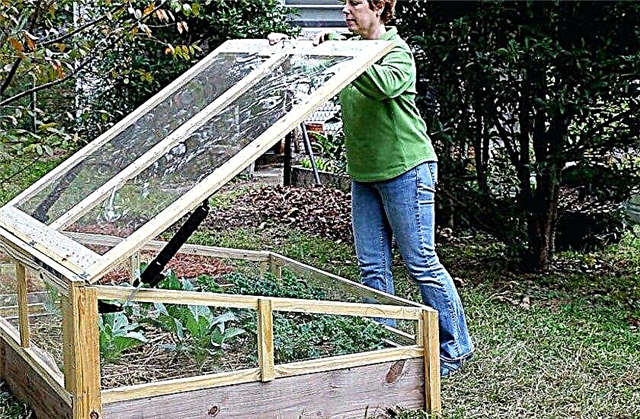
You can make such a greenhouse in the form of a glass cube with a roof, consisting of 2 triangular sidewalls and 2 sloping hinged lids.
For the manufacture of the structure, 25 wooden battens (in the form of a long and narrow parallelepiped), as well as 9 pieces of glass of the required dimensions, will be required:
- 4 rails of the same size for the bottom, side walls and the upper plane of the greenhouse on which the roof will be mounted;
- 2 slats of the same size for 2 triangular roof sides installed on parallel walls of the structure;
- 1 rail (jumper), perpendicularly connecting the top peaks of the triangular sidewalls of the roof;
- 4 slats of appropriate sizes, forming 2 wings of a hinged sloping roof;
- 5 square pieces of glass of the same size for the side walls and the bottom;
- 2 identical pieces of glass in the shape of a triangle for triangular sidewalls of the roof;
- 2 identical rectangular pieces of glass for 2 hinged roof slopes.
Did you know? In cold Iceland, greenhouses are often installed on geysers for natural heating of the structure.
Consider the step-by-step instructions for making a mini-greenhouse made of wood and glass with a hinged lid on top:
- Prepare a drawing with the necessary dimensions of the greenhouse.
- To make the bottom and side walls, make grooves for glass on 2 adjacent longitudinal faces of 8 rails (along the entire length of the rail).
- Cut their ends at an angle of 45 ° for joining with each other. Sand rails with sandpaper.
- To make the bottom, take 4 slats, apply sealant to the grooves and places of the oblique sections.
- Insert the glass into the grooves, connecting the rails to each other at the joints, allow the sealant to dry.
- Similarly, assemble the side walls of the mini-greenhouse.
- To make the upper plane of the structure on which the roof will be mounted, take 4 rails of the same size. In 2 rails, make grooves for glass on opposite sides, and in the other 2 rails - only 1 side. To process the received details with sandpaper.
- Apply sealant to the grooves and joints of the received 4 parts. Attach 1 rail with 1 groove on top to the opposite glass walls of the structure, connecting the joints. Fasten the remaining 2 rails in the same way.
- For the manufacture of triangular roof sides, take 4 rails and make glass grooves on 1 face of each of them. Sand them and apply sealant.
- Insert 2 triangular glasses into the grooves made on 2 opposite rails - the base of the roof. Fix prepared 4 rails on the remaining 4 sides of the triangular glass.
- For the manufacture of 2 reclining sloping roof parts, in the same way, connect 1 rectangular piece of glass with 4 rails. On each rail, you need to prepare 1 groove for glass and treat it with sealant. Attach the received 2 roof flaps to the lintel using metal hinges and screws.
- Seal the ends of the jumper with sealant. Insert it together with the attached flaps between the top points of the triangular roof sides. The flaps should fit snugly against the upper side of the wall of the structure and the side edges of the triangles forming triangular sidewalls.
Important! Before making mini-greenhouses made of wood and glass, it is necessary to treat the slats with an antiseptic to protect them from decay.
PVC greenhouse for seedlings
This version of the greenhouse is lightweight and able to use it not only in the room, but also in the open air. The frame of this greenhouse is made of PVC pipes, which are interconnected using special adapters using a soldering iron. From above, a film or a cover is pulled onto the frame, which serves as a shelter for seedlings. To make a mini-greenhouse from PVC pipes you will need:
- PVC pipes with walls no more than 1.5 mm thick - their number depends on the size of the finished structure;
- corners having 3 holes for pipes to arrange them perpendicular to each other;
- T-shaped adapters with 3 holes for serial connection of 2 pipes in length and installation of the 3rd pipe perpendicular to 2 others;
- special scissors for cutting pipes;
- soldering iron;
- polyethylene film;
- Scotch.
Video: PVC greenhouse mini-greenhouse
Consider the step-by-step instructions for making a room greenhouse from PVC pipes:
- Calculate the dimensions of the future design and make its drawing.
- Cut PVC pipes into the required number of parts of the required length, based on the required dimensions of the structure.
- Make the bottom of the greenhouse. To do this, insert the ends of the cut parts into the T-shaped adapters and corners so that a rectangle is obtained. To better fix the parts, heat the joints with a soldering iron. The lower part of the structure is ready.
- Make the side walls of a mini-greenhouse. To do this, insert pipe pieces of the same length equal to the height of the structure into the free holes of the corners and T-shaped adapters. Connect the joints to fix with a soldering iron.
- Next, build the upper plane of the greenhouse, which will serve as the basis for the roof. The procedure for its manufacture is similar to the manufacture of the bottom of the greenhouse. Attach the resulting rectangle to the upper ends of vertically installed pipes forming the walls of the structure. You should get a frame in the form of a parallelepiped or a cube.
- To make a roof, you need to bend in the form of an arch pieces of PVC pipes of the same length. To do this, insert plugs at one end of each piece of pipe, fill the parts with sand and close the second edge of each piece with plugs.
- When heating the resulting parts with sand inside using a building hair dryer, give them the required arched shape.
- Insert the edges of the resulting arch into the corners and T-shaped adapters of the mini-greenhouse frame, thus connecting the opposite walls of the structure.
- Pull the plastic film over the resulting frame of PVC pipes and fix it with adhesive tape. Cover the ends of the structure with a film so that you can lift it for ventilation. The room mini-greenhouse is ready.
Did you know? Most of the greenhouses are in Holland. The total area of greenhouses in the Netherlands is 10,500 ha.
The resulting mini-greenhouse must be installed in a well-lit place and put pots with seedlings inside it.
Each type of mini-greenhouse serves to perform the same task - to create the most suitable microclimate for the rapid growth of plants. Using the characteristics of each type and instructions for making mini-greenhouses at home, listed in the article, you can build a structure for seedlings that is best for you.


